Martes, Hunyo 30, 2015

Traditional trades for modern workers

thatched roof

In today’s modern world, many of the old skills that shaped our country are now performed by machines for efficiency and cost-cutting purposes.

However, these skills once held real value to those who learnt them and thankfully, in recent years, that value is being recognised once again with a resurge in interest.

Thanks to a combination of the desire to create your own income from traditional crafts and a renewed interest in original, hand-made works, people are taking up traditional crafts and trades like never before.

forge

Stonemason

While stonework has always been required in building throughout the centuries, it is best remembered when used to create exceptional decorations. Cathedrals, mausoleums, castles, palaces and similar buildings have exquisite examples of stonework at its finest. The grander the design, the more important and wealthy was the owner.

Modern buildings might not require the opulence of days gone by but stonemasons are still in demand for their skills, especially when it comes to restoring older heritage properties. When the job market fell a few years ago, many workers began looking at specialist skills in order to set themselves apart from the competition.

Builders and the like found that having a skill like stonemasonry widened their job market and gave them more work opportunities.

Thatcher

Back in the 17th century, every house had a thatched roof because that was the most common and most affordable material available. As man-made materials and roof techniques became more widespread, thatched roofs fell out of favour.

Thanks to an interest in all things traditional surfacing in the 2000s, thatched roofs have boomed in popularity. Not only are existing roofs being restored and repaired, but new houses are opting for the thatched look as well.

Because the roofs can last up to 50 years or more, there is always a need for skilled thatchers to complete repairs and restorations. This job security has led many of the younger generation to take up thatching as a trade. 

thatched roof

Image source: TedQuackenbushTedQuackenbush via Wikimedia Commons

Jewellers

Nowadays when someone says jeweller, they usually mean a person who sells jewels. However, in days gone by a jeweller was a person who crafted their own jewellery to sell.

In history, wearing jewellery became popular because the ‘celebrities’ of the day, such as kings, queens and aristocracy, wore it. For the lower classes who could not afford the opulence of royalty, they turned to local jewellers who could craft items to specific cost requirements.

Jewellers would need to know how to work with both metals and gems and the skills required are very similar to today’s modern jewellers. The increased numbers of jewellers has come about mostly due to the internet which allows smaller, independent jewellers to advertise their wares on the same platforms as larger companies.

Blacksmith

Being a local blacksmith was once a lucrative job as many of the items that people used in their daily lives were items that needed to be made by a skilled blacksmith. Items such as horseshoes, hammers, nails, swords, garden tools and cooking equipment were all crafted by the local blacksmith.

As mass production grew, the trade waned to the point where it was mostly preserved in museums and national heritage sites but when people began looking for new skills to give them the edge in the job market, blacksmithing quickly became a role for those who wished to create art and home décor in their own forges, often located in back garden workshops or garages. There is also a large market for those who wish to perform historical re-enactments or LARP (Live Action Role Play) events.

Drystone Waller

drystone wall

This might not be a skill you instantly associate with traditional crafts but it should be considering how many drystone walls there are across the UK. In the past, farmers and landowners would create drystone walls to define their borders and keep livestock from wandering.

As drystone walls do not require any cement or bonding materials, they could be erected using just stones. Nevertheless, they were not easy to create and the skill was highly regarded until quite recently.

A renewed interest in preserving the country’s history has seen many crumbling drystone walls restored and many new ones erected as well. The dry stone walls of Cape Wrath in Scotland and Hadrian’s Wall are some of the more well-known examples of dry stone walls. There are also a number of online guides and resources available to help those interested in drystone walling to get started.

The post Traditional trades for modern workers appeared first on Rated People Blog.

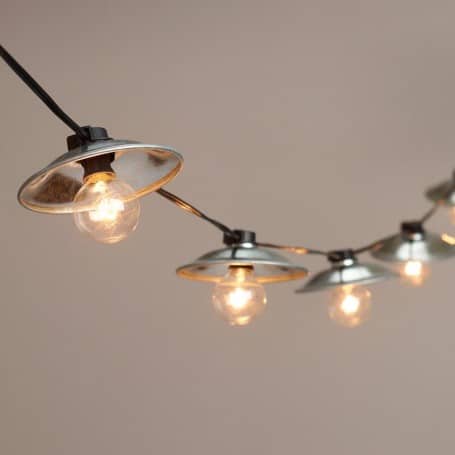
Outdoor String Lights {Gather}

Cafe String Lights - Outdoor String Lights RoundupStyle by Emily Henderson I love string lights year round, but outdoor string lights at dusk in the summer just makes me especially happy! They add such a pretty festive glow to a backyard or patio on a late summer evening, don’t you think? Many times when I’m in search of string lights for an upcoming event, the […]

This article Outdoor String Lights {Gather} is from The Inspired Room Republishing this article in full or in part is a violation of copyright law. © 2009-2013, all rights reserved.

(Tasteful!) Bling for Your Home

Does your straitlaced home need some glam? Get ready to shine it up with sparkly, shimmery luster – but without going overboard. Every part of your home can use some bling! These are our favorite pieces for getting that delicate balance … Continued

The post (Tasteful!) Bling for Your Home appeared first on QB Blog.

How to Make Your Own Watercolor Brushstroke Art

When it comes to DIY art, there is some art that’s pretty idiot proof, no art skills required… and then there’s everything that’s just waiting to be Pinterest fail unless you’re a natural artist. But for today’s Deck The Walls art tutorial, Ashley is back with another super easy project: a watercolor brushstroke art piece that only takes about 10 minutes!

Super Easy Watercolor Art Tutorial -- 15 minutes and just a couple bucks for personalized art!

Easy DIY Watercolor Brushstroke Art
by Ashley of Bigger Than The Three Of Us

Hi Guys! I’m Ashley from Bigger Than The Three Of Us, where I blog about home renovations and DIY projects all with a modern mid-century flair.

I’m so excited to be here today sharing with you a fun Brushstroke Painting that anyone can do! Seriously, I’m no painter and I managed it AND get this… it only took about 10 minutes! Crazy, right?

How to Make Your Own Watercolor Brushstroke Art by Bigger Than The Three Of Us featured on Remodelaholic

This project is so easy to customize! I’ll walk you through the steps and you can take it from there.

Here’s what you’ll need:

Materials

  • Canvas
  • Watercolor Paint
  • Water cup
  • Paper Plate

Tools

  • Paint Brush

Ready to get started? You’ll be finished before you know it. Promise!

Your first step is to prep your supplies. Put a little water in your cup and set everything out next to your canvas.

How to Make Your Own Watercolor Brushstroke Art by Bigger Than The Three Of featured on Remodelaholic

Next, you want to squeeze some of your paint on your plate. I wanted a deeper teal than the paint I had, so I squeezed a little bit of black on top of the teal that I had.

DIY Brushstroke Art Tutorial by Bigger Than The Three Of Us featured on Remodelaholic

Add a bit of water to your paint.

DIY Watercolor Brushstroke Art Tutorial by Bigger Than The Three Of Us featured on Remodelaholic

Mix the paint and water together. At this point, you may realize that that you have way too much paint. Or you are reading this tutorial completely before you start and are smarter than that! Ha. Learn from my mistakes, the paint goes a long way. On the other hand, I would rather have had too much as opposed to too little since I did a custom mix with the black. So, do what you think is best. =)

Easy Watercolor Brushstroke Art Tutorial by Bigger Than The Three Of Us featured on Remodelaholic

Eyeball your lines and just start making downward strokes. Once you get your first line completed, then you can gauge your other lines off of it.

Easy Watercolor Art Tutorial by Bigger Than The Three Of Us for Remodelaholic

Once you get to the bottom of the canvas (which takes approximately 3 min), go back over any of the paint strokes that don’t look great. Or go back over ones that you want to look darker.

Easy Brushstroke Art Tutorial by Bigger Than The Three Of Us for Remodelaholic

That’s it! I told you it was super simple.

How to Make Your Own Brushstroke Art by Bigger Than The Three Of Us for Remodelaholic

Brushstroke art is all the rage right now. I think it’s great to find something so simple and that you can customize the colors to match your decor without spending a ton of money or time. We have to save our time for those big renovations, right?!

How to Make Your Own Watercolor Brushstroke Art by Bigger Than The Three Of Us for Remodelaholic

If you had to buy everything (canvas, paint, brush, etc.), then this project would probably come out around $15. For under $15 and about ten minutes, you can have a beautiful new art piece to add to your walls or on top of your dresser.

I hope you loved this project and, if you did, you might like my Mid-Century Inspired DIY Plant Hanger or the guest room that this piece of artwork is featured in.

———————————–

Thanks for visiting us again, Ashley!

Remodelaholics, head over to Bigger Than The Three of Us to see more from Ashley, like her great guest room makeover with that awesome teardrop planter.

biggerthanthethreeofus

Coming up in #DeckTheWalls

more renter-friendly wall decor ideas, like a no-holes map wall

Map Wall Art that is Renter Friendly by Craftivity Designs for Remodelaholic

The post How to Make Your Own Watercolor Brushstroke Art appeared first on Remodelaholic.

~mini lemon loaf cakes~

We are going to a lot of potlucks this Fourth Of July, so I am getting prepared and making things I can freeze. If you make these and freeze them, add the glaze after they have thawed.
These are so good and I love lemon when it's hot out, so refreshing!
I picked up the little mini loaf pans and flags at my local craft store.


~enjoy~
xoxo

Lunes, Hunyo 29, 2015

Why your next kitchen should be a Shaker

industrial shaker kitchen

I’ve always thought of a Shaker-style kitchen as being the design equivalent of the little black dress. It’s simple, understated and yet, for all that, enduringly elegant. Much like the dress, it’s also incredibly versatile and able to look just as good stripped of all details as it does when accessorised with a cornice, chunky handle or decorative beading. Whether in natural timber or painted, in-frame or with a lay-on door, in a rustic setting or a modern apartment, its timeless credentials shine through. Here’s just a few ideas for making it work for your home.

Classic Shaker features

Two themes run through a traditional Shaker design; craftsmanship and simplicity, which is what gives the design its timeless qualities. Cabinets are classically proportioned, constructed from solid hardwood with framed doors and inset panels and subtle, if any, decoration. Another typical feature is peg rails for hanging cabinets, chalkboards and furniture, although modern incarnations may not include these. While exposed timber was the norm for the original Shaker furniture, with beech and oak often used, many kitchens are now painted, which gives even more design flexibility. This deVOL design is a beautiful example with discreet knobs, in-frame construction and shelves instead of wall cupboards.

classic shaker kitchen

Image source: deVOL Kitchens

Colourful Shaker

The simple lines of a Shaker scheme make it the perfect vehicle for colour. Many painted kitchens still tend towards a palette of creams, off-whites and sophisticated deep greys but using brighter shades on key pieces is an easy way to create focal points. Pastels work especially well alongside pale greys as do bolder shades, such as chartreuse yellow and mustard. Best of all, if you fancy a refresh, the furniture can always be given a lick of paint for a completely new look.

pink shaker kitchen

Image source: John Lewis of Hungerford

Shaker with an industrial edge

Colour isn’t for everyone, but if you still like the idea of a Shaker kitchen with a less traditional feel, there are ways to style it to give it an extra edge. The current trend for industrial-influenced décor echoes the Shaker aesthetic, uniting the authenticity of raw, unfinished materials with a pared-back look that’s built to last. Shaker-style kitchens are a perfect match for bare brick walls, exposed copper piping, knotted natural timbers, industrial-style ducting, stainless-steel appliances and concrete or concrete-effect worktops. Finished with elegant bar handles instead of knobs, the overall look is one that’s reassuringly classic with a modern twist.

industrial shaker kitchen

Image source: Harvey Jones

Modern Shaker

While most Shaker kitchens sit comfortably in a contemporary setting, the basic style has evolved beyond its fundamental features into a range of designs with increasingly modern overtones. Bringing in sleek, minimal elements, such as recessed plinths for a floating furniture feel and three-quarter-height cabinetry as a practical option for banked appliances, the new take on Shaker style allows it to be a good fit with busy family lifestyles. Twinned with fuss-free, seamless composite worktops and smart storage solutions, the result is still recognisably Shaker but interpreted for a modern age.

modern shaker kitchen

Image source: Second Nature

The post Why your next kitchen should be a Shaker appeared first on Rated People Blog.
95 Ways to Hide or Decorate Around the TV, Electronics, and Cords

 95 Ways to Decorate Around or Hide-Disguise a Television, Electronics, and Cords @Remodelaholic

How to Decorate Around The TV and Electronics

When it comes to interior decorating, every household has at least one obstacle: electronics. More and more the television, media players, and game consoles are an integral part of most family rooms. But they aren’t really very attractive. So, how do you strike the balance between having the technology available without having it stick out like a design-sore thumb? We have almost 100 ideas to get you inspired!

In this post:
page 1: how to decorate around the TV
page 2: TV gallery wall ideas
page 3: creative ways to hide your television
page 4: tricks for hiding electronics and cords

27 ideas for decorating around the TV! plus gallery walls and other techniques to hide the television @Remodelaholic

Incorporate and Decorate Around the Television

The old saying, “If you can’t beat ’em, join ’em” often rings true in functional family decorating. Some things just need to be in your house, and some habits (shoe dropping, anyone?) are more easily accommodated by adjusting the system rather than trying to overthrow it completely. The television decor situation is the same — sometimes, it’s just more effective to embrace it and let it be than to try to hide it! (Although we do have ideas for that on page 3, of course 
<div style='clear: both;'></div>
</div>
<div class='post-footer'>
<div class='post-footer-line post-footer-line-1'>
<span class='post-author vcard'>
Ipinaskil ni
<span class='fn' itemprop='author' itemscope='itemscope' itemtype='http://schema.org/Person'>
<meta content='https://www.blogger.com/profile/13765311264901007909' itemprop='url'/>
<a class='g-profile' href='https://www.blogger.com/profile/13765311264901007909' rel='author' title='author profile'>
<span itemprop='name'>Eve Julien</span>
</a>
</span>
</span>
<span class='post-timestamp'>
sa
<meta content='http://evejulien.blogspot.com/2015/06/95-ways-to-hide-or-decorate-around-tv.html' itemprop='url'/>
<a class='timestamp-link' href='http://evejulien.blogspot.com/2015/06/95-ways-to-hide-or-decorate-around-tv.html?m=0' rel='bookmark' title='permanent link'><abbr class='published' itemprop='datePublished' title='2015-06-29T20:03:00-07:00'>8:03 PM</abbr></a>
</span>
<span class='post-comment-link'>
<a class='comment-link' href='http://evejulien.blogspot.com/2015/06/95-ways-to-hide-or-decorate-around-tv.html?m=0#comment-form' onclick=''>
Walang komento:
  </a>
</span>
<span class='post-icons'>
<span class='item-control blog-admin pid-564637652'>
<a href='https://www.blogger.com/post-edit.g?blogID=4951471961545387590&postID=3273178491888098508&from=pencil' title='Baguhin ang Post'>
<img alt='' class='icon-action' height='18' src='https://resources.blogblog.com/img/icon18_edit_allbkg.gif' width='18'/>
</a>
</span>
</span>
<div class='post-share-buttons goog-inline-block'>
<a class='goog-inline-block share-button sb-email' href='https://www.blogger.com/share-post.g?blogID=4951471961545387590&postID=3273178491888098508&target=email' target='_blank' title='I-email Ito'><span class='share-button-link-text'>I-email Ito</span></a><a class='goog-inline-block share-button sb-blog' href='https://www.blogger.com/share-post.g?blogID=4951471961545387590&postID=3273178491888098508&target=blog' onclick='window.open(this.href,

Delegating {Meal Planning & Shopping}

Blue Apron - The Inspired RoomThis post prepared in partnership with Blue Apron I think delegation is the number one secret I’ve found for time management. If you want to stay sane as a mom or anyone who has a lot of responsibilities and things to juggle, you have to focus on doing things only you can do, and then just say no to non-essentials […]

This article Delegating {Meal Planning & Shopping} is from The Inspired Room Republishing this article in full or in part is a violation of copyright law. © 2009-2013, all rights reserved.

~apple of my eye sign & pattern~

Today I am going to show you how to make this cute sign!


First off you need a piece of MDF {medium density fiberboard}
These come in large sheets for around $7.00, I got mine at Home Depot.
Cut it down to 15" x 24"

For the frame you will need 1x2's. I chose cedar, again, purchased at Home Depot.
You need to cut these at a 45 degree angle.
They should be skinny side up when sitting on your saw.
Cut them to fit the outside edge of your MDF.


Once your pieces are cut, sand any rough edges off.
Then stain your frame pieces.
I used weathered gray wood stain by Varathane.
Again, I purchased this at Home Depot.
I applied it with a paper towel, wiped it on, and wiped it right back off.


Next you will need to paint 2 coats of satin or eggshell paint onto your MDF.
I used Swiss Coffee Behr.


While all that is drying you can print out your pattern.
This is the pattern below.
Enlarge it at a copy center, or on your home printer if you have a scanner.
You can always piece it together if it won't print all on one page.
Then use this technique to transfer the pattern on to your painted MDF.
Paint in the wording and the apple, let dry, then sand lightly for a distressed look.
I finished mine off with a coat of clear wax, but this is optional.


Now it's time to put your frame together.
Line up the edges and use a nail gun to attach together. You can always use wood glue and clamps if you don't have a nail gun.
The four little pieces in the corners and just scraps used to hold it all together.


Then if you measured everything correctly you should just be able to pop in your sign and again, nail in place, or use wood glue on those supporting pieces.


~happy crafting~
xoxo