We are welcoming another amazing and talented DIYer to our contributor team today! You are going to LOVE Elisha and her awesome projects, so give her a warm Remodelaholic welcome and be sure to go check out all her projects at Pneumatic Addict!
Hi everyone! My name is Elisha and I blog at PneumaticAddict.com. I'm a life long DIYer and power tool addict. My blog features in-depth tutorials on topics like furniture building, home decor and home improvement.
We moved into our new house about nine months ago and its the first time we've had a landscaped backyard. I'm loving it! We are spending so much time outside, I feel inspired to spruce up our space. I started by building a Rolling Outdoor Island, and hanging a DIY Solar Powered Chandelier. Recently, I made a tall concrete planter and I'm here to show you how. Scroll down for free building plans.
How to Build a Tall Concrete Planter
by Elisha of Pneumatic Addict
This post may contains some affiliate links. Please see our full privacy policy and disclosure here.
Materials List:
(1) 4′ x 8′ x 3/4″ sheet melamine
(1) 23-3/4″ x 96″ melamine shelving
(1) 2 x 4 x 96″
(1) 3/4″ PVC pipe
(8) 50 lb bag of quick setting concrete mix
(4) 1 lb concrete pigment
masonry trowell
plastic drop cloth
duct tape
silicone caulk
2″ wood screws
2-1/2″ wood screws
1/8″ drill bit
power drill
circular saw
shovel
wheelbarrow or large sturdy container
Cut List:
(2) melamine sheet @ 23-3/4″ x 32″
(2) melamine sheet @ 21-1/4″ x 32″
(1) melamine sheet @ 23-3/4″ x 30-1/4″
(2) melamine sheet @ 16-3/4″ x 30″
(2) melamine sheet @ 18-1/4″ x 30″
(1) melamine sheet @ 16-3/4″ x 16-3/4″
(2) 2 x 4 @ approximately 39-1/2″
(1) 2 x 4 @ 16-3/4″
1. The first step was to construct the outer box of the form. I attached the wider panels to the outside edges of the smaller panels, and secured them in place with 2″ wood screws. To avoid blowout, I made sure to pre-drill with a 1/8″ drill bit before driving the screws.
2. Next, I attached a 23-3/4″ x 30-1/4″ panel to the bottom side of the box.
3. Despite having a black thumb, I remembered to include drains in the bottom of my planter. I cut two, 2″ lengths of PVC and glued them to the inside of the bottom panel.
4. I decided to give my planter a little decorative detail. I cut and mitered some screen moulding, and attached it around the inside perimeter of the form. You could use almost any kind of moulding, but make sure its either solid wood or plastic. MDF will dissolve while sitting in the wet concrete and be almost impossible to remove.
5. Next, I put the inner box together. Unlike the outer box, I drilled 3/4″ pocket holes along the long sides of the 16 3/4″ x 30″ panels. I then joined them together with the 18-1/4″ x 30″ panels.
6. I cut a 16-3/4″ x 16-3/4″ panel and drilled pocket holes around the perimeter. I aligned the panel flush with the bottom of the box and secured it in place with 1-1/4″ screws.
7. I cut a 16-1/4″ length of 2 x 4 and drilled two pocket holes on each end. I then attached it between the two shorter panels of the inner box, using 2″ screws.
8. To make the forms water-tight, I sealed every seam on both boxes with silicone caulk.
Next, I used duct tape to cover any of the raw edges of the melamine.
9. I cut the remaining 2 x 4 in half to use as support rails. I spaced them evenly across the top of the inner box and secured them in place with 2-1/2″ screws.
10. Time to pour the concrete. I'll give this advice: when working with dyed concrete, make sure to lay down a thick plastic drop cloth. It will stain everything it comes in contact with. I also highly recommend setting up your form close to where your planter will permanently sit. The finished piece will weigh around 400 lbs, so you don't want to be moving it further than you have to.
I placed the outer box on a flat, level surface, and started to pour. I poured the concrete two inches thick, just to the top of the drains. I took a quick minute to tamp the concrete and knock out air bubbles.
11. Immediately I placed the inner box inside the outer box and made sure I had a 2″ clearance on all sides. I drove two screws through each support rail, into the outer box, securing the form in place.
Then, I kept shoveling the concrete till I reached the top of the form, tamping and knocking out air bubbles as I went.
When the concrete is firm enough to hold a thumbprint, I used a steel masonry trowel to smooth the top.
At this point I cleaned up and anxiously waited for paint concrete to dry. The mix I used recommended at least 18 hrs, but I would wait longer if you can.
Removing the form and moving the planter with just two people was definitely challenging. I think it would be a great idea to rent a furniture dolly and invite a few buddies over. Once you have your new concrete planter in place, you can plant just about anything you'd like. It's even large enough to house a small tree.
The inexpensive screen moulding was simple to install and I'm thrilled with the clean design they left.
Now I really wish I had a huge front porch. A pair of tall, decorative planters would look amazing sitting by my front door. What do you think? Are you ready to get your hands dirty and make your own
-------------------–
More ways to give your outside landscaping a LIFT:
Greetings! As I mentioned recently, we had several interior rooms painted over the last couple of weeks. I had been wanting to have the walls painted since we moved in, so I couldn't be happier to finally have everything freshened up! In case you missed it, you can see what the walls looked like before here. The fresh coat […]
Favorite Console Table: I am always a sucker for an IKEA hack and this console table turns out beautiful. Designer Trapped in a Lawyer's Body added some fun touches.
Favorite way to create shade: Umbrellas are a perfect way to add shaded seating to a patio or yard. Don't do it in a boring color. Paint an umbrella like The Heathered Nest did for a dramatic effect!
Favorite Organizing Idea: A craft, sewing or DIY space usually has a table and needs some organization. Combine the two with this awesome solution from deJong Dream House.
Favorite Centerpiece: I love the scallops on this centerpiece. Add in flowers to match a holiday or event. It is simply beautiful by HerToolBelt.
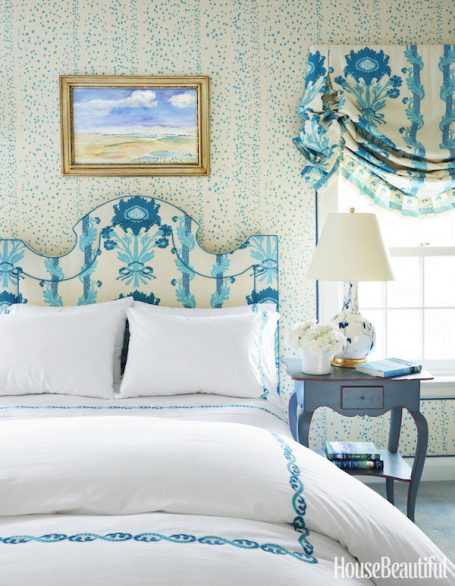
Favorite Kid Bedroom: So many things to love about this space. From the shelves to the lamps to the shiplap, it is adorable!
If you're building a house, remodeling your existing house, or refurnishing, you may be considering built-in furniture. Naturally, you'll have a lot of questions: why […]
If you've been a Remodelaholic very long, you know that we are big fans of great area rugs - especially colorful and interesting rugs! So we were excited when the folks from Maples Rugs contacted us (after seeing one of their rugs in Kristin's office makeover that we featured here) about working together to show off some of the pretty and affordable rugs they manufacture - which are all made right here in the USA! You can see all of Maples Rugs great selection on their website, plus we picked out some of our favorite to share with you, PLUS the folks at Maples are so very generously giving away TEN that is right, TEN of the rugs they make to some very lucky winners. Be sure to read to the end of the post to see all the amazing rug options! And don't forget to pin the roundups for future reference.
Maples Rugs has so very generously agreed to giveaway TEN rugs to 10 lucky winners.
Enter using the widget below. The 10 lucky winners will be randomly chosen after the giveaway ends on Monday, July 18th, 2016 at 12:00 pm MST and contacted via email for their choice of rug, which Maples will ship directly to them. Winners must respond within 24 hours or new winners will be selected. Open to continental US, void where prohibited by law, must be 18 years old or older to enter.
This giveaway is sponsored by Maples Rugs, but the pretty rug selections are all our own choosing! This post also contains affiliate links; learn more and read our full disclosure policy here.
Affordable Floral Rugs Under $150
Budget-Friendly Geometric Rugs under $150
Low-Cost Abstract and Patterned Rugs Under $150
Aren't those rugs awesome? Now you can redecorate without giving up your entire budget for a new rug!
House Beautiful Hang a single painting Country Living Hang a large basket Lonny Hang a statement mirror Design Sponge Hang art on a shelf/ledge House Beautiful Use small frames to create a gallery wall grid The Painted Hive Hang large art in place of a headboard Jen Kay Home Tour via The Everygirl Add something […]
Hello! My name is Mindi and I blog at MyLove2Create, the last post I shared here was my DIY Antique Cutting Boards, today I am sharing my Elevated Planter Box!
Isn't it so fun!? I am so happy with it, and the fact that I won't have to bend over to do my weeding…THAT is the biggest bonus!
This is a very simple and sturdy build, and you can complete it in just one day, so if you don't have plans for the weekend…this just might need to be your next project! Speaking of projects…can you spy my Old Chairs into New Bench? It is still one of my faves. BlogThis!Ibahagi sa TwitterIbahagi sa FacebookIbahagi sa Pinterest
Before we move on from the focus on kitchens in our Best of the Best Room Makeover summer series and (as promised) look at pretty bedrooms for awhile (we'll come back to kitchens, though, because there's so much more to talk about that I couldn't get to!), I thought I would share about the simplicity of a kitchen paint […]
This post is in partnership with Kathy Davis, an artist, author and lifestyle brand. Hello, friends! “Create a life you love” is the inspiring tagline behind the brand of artist and author Kathy Davis. Her sentiment and philosophy certainly resonates with me! We've been through many changes and sacrifices as a family in our quest to create a life we love. Pursuing that life is actually how we […]
In honor of Independence Day, we're celebrating – what else? – the iconic American flag. The bold combination of red (which stands for hardiness and valor), […]


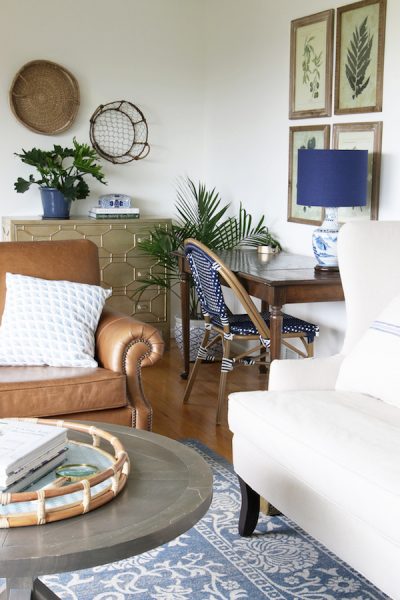 Greetings! As I mentioned recently, we had several interior rooms painted over the last couple of weeks. I had been wanting to have the walls painted since we moved in, so I couldn't be happier to finally have everything freshened up! In case you missed it, you can see what the walls looked like before here. The fresh coat […]


 Loading InLinkz ...


 House Beautiful Hang a single painting Country Living Hang a large basket Lonny Hang a statement mirror Design Sponge Hang art on a shelf/ledge House Beautiful Use small frames to create a gallery wall grid The Painted Hive Hang large art in place of a headboard Jen Kay Home Tour via The Everygirl Add something […]


 Before we move on from the focus on kitchens in our Best of the Best Room Makeover summer series and (as promised) look at pretty bedrooms for awhile (we'll come back to kitchens, though, because there's so much more to talk about that I couldn't get to!), I thought I would share about the simplicity of a kitchen paint […]
 This post is in partnership with Kathy Davis, an artist, author and lifestyle brand. Hello, friends! “Create a life you love” is the inspiring tagline behind the brand of artist and author Kathy Davis. Her sentiment and philosophy certainly resonates with me! We've been through many changes and sacrifices as a family in our quest to create a life we love. Pursuing that life is actually how we […]