Lunes, Pebrero 22, 2016

Beautiful Bamboo in the Bathroom

While wood is commonplace in many (if not most) bathrooms, bamboo is one of the rarer woods used. Its an unfortunate omission: bamboo is a hardy, affordable, and attractive wood (technically its grass, but we digress) that can be used Continued


The post Beautiful Bamboo in the Bathroom appeared first on QB Blog.

Freestanding Kitchen Islands and Carts

Barrelson Kitchen Island With Marble Top - Williams Sonoma
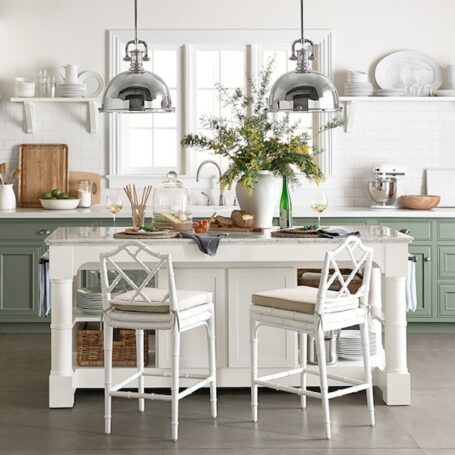
Beautiful kitchen and freestanding island fromWilliams Sonoma Greetings, friends! Hope you all had a great weekend!I really enjoyedsharing my floor plan ideas last week and dreaming with you about the possibilities for our kitchen layout! I willbe back to sharea few additional and updatedideas for other partsof ourfloor plan(including answering the big question of where []


This article Freestanding Kitchen Islands and Carts is from The Inspired Room Republishing this article in full or in part is a violation of copyright law. 2009-2013, all rights reserved.


A Modern Man Cave Mood Board


Mancave MB Pinnable Image


Hello again! Dawn here, fromDesigningDawn.com, back with another mood board for your decoration inspiration. This month, I wanted to try something a little different, and decided that a modern man cave moodboard would be a fun challenge. I like the idea of working up a space that a guy would dig but that wouldnt make his wife cringe. 
<div style='clear: both;'></div>
</div>
<div class='post-footer'>
<div class='post-footer-line post-footer-line-1'>
<span class='post-author vcard'>
Ipinaskil ni
<span class='fn' itemprop='author' itemscope='itemscope' itemtype='http://schema.org/Person'>
<meta content='https://www.blogger.com/profile/13765311264901007909' itemprop='url'/>
<a class='g-profile' href='https://www.blogger.com/profile/13765311264901007909' rel='author' title='author profile'>
<span itemprop='name'>Eve Julien</span>
</a>
</span>
</span>
<span class='post-timestamp'>
sa
<meta content='http://evejulien.blogspot.com/2016/02/a-modern-man-cave-mood-board.html' itemprop='url'/>
<a class='timestamp-link' href='http://evejulien.blogspot.com/2016/02/a-modern-man-cave-mood-board.html' rel='bookmark' title='permanent link'><abbr class='published' itemprop='datePublished' title='2016-02-22T20:07:00-08:00'>8:07 PM</abbr></a>
</span>
<span class='post-comment-link'>
<a class='comment-link' href='http://evejulien.blogspot.com/2016/02/a-modern-man-cave-mood-board.html#comment-form' onclick=''>
Walang komento:
  </a>
</span>
<span class='post-icons'>
<span class='item-control blog-admin pid-564637652'>
<a href='https://www.blogger.com/post-edit.g?blogID=4951471961545387590&postID=5052930559187154485&from=pencil' title='Baguhin ang Post'>
<img alt='' class='icon-action' height='18' src='https://resources.blogblog.com/img/icon18_edit_allbkg.gif' width='18'/>
</a>
</span>
</span>
<div class='post-share-buttons goog-inline-block'>
<a class='goog-inline-block share-button sb-email' href='https://www.blogger.com/share-post.g?blogID=4951471961545387590&postID=5052930559187154485&target=email' target='_blank' title='I-email Ito'><span class='share-button-link-text'>I-email Ito</span></a><a class='goog-inline-block share-button sb-blog' href='https://www.blogger.com/share-post.g?blogID=4951471961545387590&postID=5052930559187154485&target=blog' onclick='window.open(this.href,

Detail

Milan headquarter of RAI (former EIAR). Designed in 1939 by architect Gio Ponti and engineer Nino Bertolaia

Sabado, Pebrero 20, 2016

DIY Stair Slide, or How to Add a Slide to Your Stairs


There are so many ways to update stairs -- take up the carpet, use a runner, paint, restain, replace the railing, build a new banister/newel post, add fabric, to name a few -- but not all of them are FUN like Erin's stairs are now. For kids or kids at heart... just add a slide to your stairs!


Amazing and SO FUN! Add a slide to your stairs. Fun for the kids, plus it's easily removable for when you need the full width of the stairs to move furniture, or to move it to a new house! Tutorial from DecorAllure on Remodelaholic.com


Read below for the details of Erin's simple DIY stair slide, and consider adding these other kid-fun features to your home too... they're only little for a little while, so make it FUN!


Bunk-bed-playhouse-remodelaholic

bunkbed playhouse, Remodelaholic


kids playing in the indoor treehouse loft, I Am Hardware featured on Remodelaholic

indoor treehouse play loft, I Am Hardware on Remodelaholic


Under the stairs kids play house (18)

playhouse under the stairs, Joy2Journey on Remodelaholic


See more fun basement rec room and play room ideas here -- and here's Erin with the details of her stair slide:

What a fun idea! This easy DIY stair slide would be so fun on a wide set of stairs, plus it's easy to remove when you need to move things up the stairs, etc.


DIY Stair Slide

by Erin of Decor Allure


Note from Remodelaholic: As with any tutorial here on Remodelaholic, this post is for entertainment purposes only. All projects performed following instructions on this site are done at your own risk. Please consult a professional before attempting any project of which you are unsure. Take all necessary safety precautions. Neither Remodelaholic nor Decor Allure are responsible for any injury or damage sustained while attempting to duplicate projects or tutorials. So remember: be smart, be safe!


Hello, DIYers! My name is Erin from Decor Allure. I'm a full-time mom of six kids, active in my church's women's group, avid decorator and world's worst blogger ( I really just do it to share our projects with friends, family and any curious diy-ers like us.) My amazing and handy engineer husband loves to help me find ways to make our home beautiful, but totally unique.


One of the fun projects we did together in our last house in Chicago, was finishing our basement (with a crazy tube slide) HERE. We also recently finished off an attic space in our current Houston home that includes a two-story climbing passage HERE. We also added a built-in bench in our eating nook HERE that I've always wanted to do on one of our homes and this one was the perfect set up for one!


Today, I want to share how we added a slide to our stairs (since everyone was so sad to leave the slide in our last house!) It was actually a pretty easy project. We dreamed up all kinds of different ways we could do it, but ended up with just doing a fairly simple, but sturdy design. Our stairs were wider than usual so we knew we had room to add the slide and still have room to walk up and down the stairs (there is still 27? next to the slide.) We also didn't have a wall right in front of you when you get to the bottom of the stairs (we have 5 feet of space before that corner! There is more space for landing than the pictures show.) Finally, we wanted it to be easily removable for when we needed to move furniture.


I need this in my house for sure! DIY stair slide, with a super easy tutorial, plus the slide is easy to remove if needed for moving furniture up the stairs, etc. DecorAllure on Remodelaholic.com


DIY indoor stair slide, with a super easy tutorial, plus the slide is easy to remove if needed for moving furniture up the stairs, etc. DecorAllure on Remodelaholic.com


DIY indoor stair slide, with a super easy tutorial, plus the slide is easy to remove if needed for moving furniture up the stairs, etc. DecorAllure on Remodelaholic.com


Amazing!! Add a kids slide to your existing stairs by Decor Allure featured on @Remodelaholic


DIY indoor removable slide over existing stairs by Decor Allure featured on @Remodelaholic


How We Made Our Stair Slide:


1. After we decided on a width of 18? for our slide, we cut 3/4? sanded plywood into 2 lengths. We needed almost 9 feet in length. Plywood is only 8feett long, so ours required a seam.

Tutorial for indoor slide installed over existing stairs and completely removable by Decor Allure featured on @Remodelaholic


2. We attached the two lengths with 3 metal mending plates. The seam was placed between two stairs, about a 1/4 of the way down, so that the plates didn't make the slide sit up on the stair edges (you want all of the slide to sit on the stair edges to give it support all the way down.)


3. We sanded not only the seam smooth, but the beginning and end edges to get rid of any sharp edges (it also makes it lower-profile to prevent tripping.) The triangular supports were also sanded smooth so it didn't cut into the carpet much.

7 Step by Step instructions for stair slide by Decor Allure featured on @Remodelaholic


4. Triangular supports were cut to the depth and height or our stairs and attached in four places on each side by screws from the top and L brackets underneath.

8 How to support a kids slide installed over existing stairs by Decor Allure featured on @Remodelaholic


5. From underneath, we screwed on a low-profile handrail (similar to this) directly on the top of the right side of the slide.


6. Flush mounting brackets (we got larger ones from Rockler Woodworking) were attached on the wall and the triangular supports. We ended up only using two sets to make it easier to align when taking on and off. They're really only needed to assure that the slide doesn't move forward as the kids go down (all the weight is on the stair edges and the supports.) These mountings allow for the slide to be right up to the wall, not leaving a gap where little fingers could be caught.


9 Interlocking brackets for preventing a gap between shelf and wall by Decor Allure featured on @Remodelaholic


7. Finally, we painted with a good enamel paint (I used Sherwin Williams) in a gloss finish and white to match our home's molding. The slide was super fast without the paint, so I'm glad the paint slowed it down. I still insist on a cushion at the bottom.


10 Kids stair slide, DIY Tutorial by Decor Allure featured on @Remodelaholic


11 Add fun to your home with a stair slide for your kids, complete tutorial by Decor Allure featured on @Remodelaholic


12 Removable stair slide DIY project by Decor Allure featured on @Remodelaholic

It is an absolute hit with both the kids and the adults! We're so glad we did it! Thanks for letting us share it with you!


---------------------------


Erin, this is SO fun! Thank you so much for sharing!


Remodelaholics, Erin might call herself the world's worst blogger, but I guarantee you are going to want to check out her stuff at Decor Allure! Amazing projects, like her previous basement remodel with the other slide she mentioned, plus this cool built-in bookshelf and a swing! And this attic playroom which has a climbing platform tower to get to it -- enclosed in an empty wall in the entryway. Seriously so cool!


basement rec room with recessed built-in bookshelf under a soffit


The post DIY Stair Slide, or How to Add a Slide to Your Stairs appeared first on Remodelaholic.

Biyernes, Pebrero 19, 2016

Our Remodel Floor Plan {Part Two}

Kitchen with a View by Reef Cape Cods Home Builder
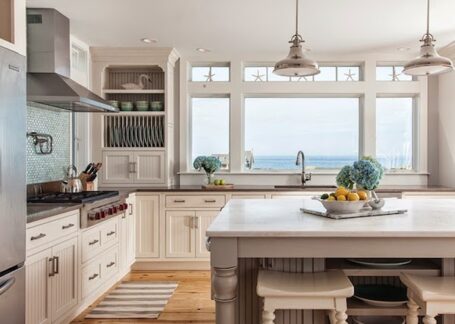
Reef Cape Cod's Home Builder Thank you all for your enthusiasm and for putting your thinking caps on as we are planning out our remodel! I read each idea you have and run right over to look and see if it would work :) so it's like you are right here with me! If looking at before [...]


This article Our Remodel Floor Plan {Part Two} is from The Inspired Room Republishing this article in full or in part is a violation of copyright law. (C) 2009-2013, all rights reserved.


25+ Brilliant In-Wall Storage Ideas For Every Room In Your Home


25+ In-Wall Storage Ideas via Remodelaholic.com


In-Wall Storage Ideas


Storage is such a luxury, especially in small spaces. A great way to squeeze in more storage to a tiny room or home is to add it in-between the studs. Recessed or in-wall storage ideas are so useful. These ideas add space to bathrooms, kitchens and just about any other nook and cranny you can find in your home. Tap into that unused space between the studs and add some in-wall storage.


Bathroom In-Wall Storage Ideas


Bathroom Storage


The Learner Observer for Remodelaholic.com - Built-in medicine cabinet


Recessed Mirrored Medicine Cabinet by The Learner Observer for Remodelaholic


in wall bathroom storage between studs


Beautiful Bathroom Storage by Pregnant with Power Tools for Remodelaholic


custom recessed medicine cabinet


Custom Recessed Medicine Cabinet by Batchelor's Way for Remodelaholic


low-cost bathroom update recessed medicine cabinet


Pretty Recessed Medicine Cabinet on Better Homes and Gardens


FH08NOV_WALNIC_01


In-Wall Niche Perfect for any room by The Family Handyman


bathroom-shelves-1-643x1024


Tall In-Wall Bathroom Shelves by Not Just a Housewife


tiny-powder-room5


Tiny Powder Room with Recessed Shelves by Yuliany


Beadboard Bathroom in-wall storage


Recessed Open Bathroom Shelves by Tidbits from the Tremaynes


DIY-medicine-cabinet...-we-designed-and-built-a-mirrored-storage-cabinet-for-our-old-house-bathroom-remodel.


Recessed DIY Medicine Cabinet by Victoria Elizabeth Barnes


DSC_0096


Between Studs Storage Tutorial by Logic and Laughter


Bathroom cleaning storage


Bathroom Cleaning Storage at Amazon


Screen Shot 2016-02-15 at 11.38.14 AM


In-Wall Magazine Rack by Hamtil Construction on Hometalk


Next up, 7 Kitchen and Pantry In-Wall Storage Ideas


The post 25+ Brilliant In-Wall Storage Ideas For Every Room In Your Home appeared first on Remodelaholic.

Characteristics of Mediterranean Decor

Who doesn't fantasize about trips to warm climates in the winter? Sunshine, sand, lapping waves, utter relaxation. Perhaps that's why so many choose (or wish) to outfit their homes in Mediterranean decor; it evokes visions of sun-filled vacation days. Mediterranean style, ... Continued


The post Characteristics of Mediterranean Decor appeared first on QB Blog.

Casa A

By Estudio GMARQ

Huwebes, Pebrero 18, 2016

I think we have the winner! {our remodel floor plan}

Kitchen Layout - White Kitchen Sink by Stove - House Beautiful
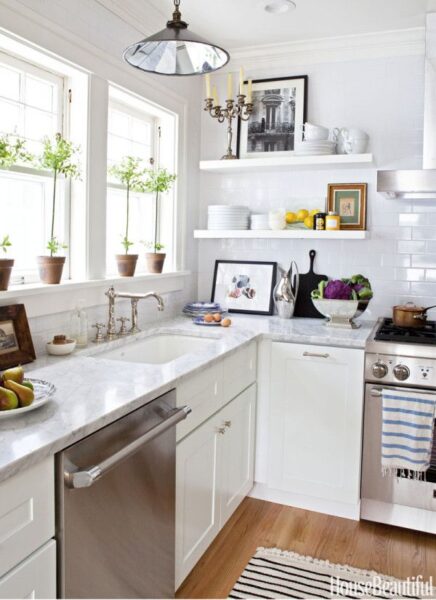
House Beautiful At long last, we have a floor plan that I really believe is THE winner! Finally, right? If we get our contractor's thumbs up, we will call it official. I so appreciate all of your great ideas and for following along with this renovation! Over the past few months as I've been getting to know this house, I've [...]


This article I think we have the winner! {our remodel floor plan} is from The Inspired Room Republishing this article in full or in part is a violation of copyright law. (C) 2009-2013, all rights reserved.


DIY Concrete Countertops in a Beautiful Master Bathroom Renovation


Kitchen and bathroom remodels can very quickly become time-consuming, expensive, and just all-out frustrating, so we love finding ways to save time, money, or sanity while we're remodeling (although, let's be honest -- choose 2 out of 3, because it's near impossible to keep them ALL while you're tearing your house apart!).


Amazing master bathroom renovation! DIY concrete coutnertops with vessel sinks, wood tile floor, and so many more beautiful updates! @Remodelaholic


The very talented Jamie and Morgan (remember them from here, here and here?) are back today to share how they turned their dated master bathroom into this beauty -- plus they're going to teach you how to make your own DIY concrete countertops!


Read below for Jamie and Morgan's bathroom renovation details, and if you're looking for a different look but still want to save some cash by DIYing your countertops, try one of these:


DIY solid wood countertops for $100


DIY wood countertops from old wood doors, The Mustard Ceiling on @Remodelaholic


budget-friendly marble tile countertops


self-install marble tile countertop, over existing laminate countertop, tile backsplash applied over existing tile backsplash, Zevy Joy featured on @Remodelaholic


concrete countertops over existing countertops


Tasha Designer Trapped diy concrete countertop feather finish bathroom vanity with integral sink


painted faux marble countertops

(plus see painted faux stone countertops here, and read reviews of how painted countertops hold up here)


faux marble countertop tutorial, Batchelors Way on Remodelaholic.com


and don't miss reading how other DIYers rate their countertop experiences and durability!


Countertop Durability and Reviews @Remodelaholic


Give Morgan and Jamie a biiiig welcome back!


DIY concrete countertops Construction2Style on @Remodelaholic


Master Bathroom Renovation with DIY Concrete Countertops

by Jamie and Morgan of Construction2Style


Thank you Justin and Cassity for once again welcoming us into your space online. We are so excited to be showing our full before and after master bathroom renovation, featuring our tutorial on how to make your own concrete countertops.


If you missed it, we had the pleasure of sharing our kitchen remodel in this same home and chatting about how you can build a kitchen range hood for under $40, including detailed design plans.


We purchased our second home to update to sell and make a profit on a couple years ago. Over the last two years, slowly but surely, we have been able to fix everything we need to, to get it back on the market this spring and we'll be onto our next renovation property!


The master bathroom in this home was one of my favorite rooms that we renovated in the home. This home was built in the 70's and as you can tell, was in need of some updates.


tutorial to make your own DIY concrete countertops Construction2Style on @Remodelaholic (9) tutorial to make your own DIY concrete countertops Construction2Style on @Remodelaholic (13)


We started by gutted the entire bathroom. Removing the wallpaper, replacing flooring, expanding the shower, new fixtures, paint, cabinetry, countertops, you name it! We weren't entirely sure what style we wanted to go with in this room.


master bathroom renovation Construction2Style on @Remodelaholic (2)


One of the many things we have always wanted to try DIY has been concrete countertops. At first we were even contemplating making them for our kitchen. But then we decided, being we had never made them before, we better start out with a smaller project, so we opted for our master bathroom vanity countertop.


I had been hearing the rave on these for awhile and when I ran it past Jamie, he said he had been actually wanting to try make one. So as soon as he said he was up for the challenge, I knew it was going to be a fun project to work on together. We did some research on how to make these but in the end Jamie decided he was going to go with his own technique. So here it is!


DIY Concrete Countertops Tutorial -- they tinted them charcoal for a darker look @Remodelaholic


We knew we had to start by making a base form for the concrete to be poured into. We wanted the countertop pretty thick so we went with 2? thickness. We used melamine lumber, which already has a smooth finish and is typically used for building cabinets, for our concrete mold. We had read that plywood works too but you then have to finish the plywood with a finish to ensure no bubbles or different marks appear within your concrete. So we went with the melamine to avoid one step. For added strength it's a good idea to use some sort of steel mesh. Cut the mesh just shy of the outsides of the mold.


how to make your own solid concrete DIY countertops with forms and tinted concrete (3)


We used quikrete concrete for the mix. Depending on the size of countertops you are making will depend on how much concrete you will need. The bags will have a coverage rate printed on them. For ours we used about three 80 pound bags.


tutorial to make your own DIY concrete countertops Construction2Style on @Remodelaholic (10)


TIP: USE MELAMINE LUMBER FOR THE MOLD


tutorial to make your own DIY concrete countertops Construction2Style on @Remodelaholic (24)


We added PVC piping into the mold for where the pipes would be for the bathroom sink and faucets. It is important to make sure the size is correct for the drain and the faucet. We then caulked the inside of the mold with silicone caulking. This step isn't necessary but we wanted a rounded edge rather than a sharp edge.


tutorial to make your own DIY concrete countertops Construction2Style on @Remodelaholic (30)


Once the mold was all set and ready, we mixed the concrete and water into a large bucket using a shovel.


how to mix concrete for DIY concrete countertops


In our mix we also added charcoal colored dye to tint the color of our countertops . Add water for the consistency that you want and then pour the concrete into the mold.


DIY tinted concrete countertops -- look like granite but much less expensive!


how to mix and tint concrete to make your own concrete countertops, budget friendly DIY job!


TIP: USE PVC PIPING IF HOLES ARE NEEDED SO YOU DON'T HAVE TO DRILL OUT LATER


how to make your own solid concrete DIY countertops with forms and tinted concrete (1)


The mesh should be placed in the middle of the concrete. So, we started by shoveling half of the concrete into the mold before we put the mesh overlay in.


tutorial to make your own DIY concrete countertops Construction2Style on @Remodelaholic (22)


Make sure you have your mold on a level surface when pouring the concrete into the mold. Once half of the concrete has been poured into the mold, we sprinkled pebbles within the concrete along the edges to add some texture. Whether you want to use colored glass, crushed and colored stone, or other materials, it is the perfect way to add some fun to your concrete countertops so they're not too plain.


tutorial to make your own DIY concrete countertops Construction2Style on @Remodelaholic (31)


We then set the steel mesh into the mold. Once the mesh is set in add the rest of the concrete mix.


tutorial to make your own DIY concrete countertops Construction2Style on @Remodelaholic (37)


Using a piece of wood, we scraped any excess concrete off, to ensure it was perfectly firm and level.


tutorial to make your own DIY concrete countertops Construction2Style on @Remodelaholic (11)


We sprinkled additional pebbles on top of the concrete and pushed them down into the concrete, while keeping some on the top throughout.


tutorial to make your own DIY concrete countertops Construction2Style on @Remodelaholic (14)


When the mold was filled we use a palm sander (you can use anything that will vibrate) to vibrate any air pockets out of the mix. This also works the mix into all the tight areas of the mold.


When DIYing concrete countertops, use a palm sander to vibrate the molds and get out the air bubbles for a sturdy solid slab countertop.


TIP: A PALM SANDER WORKS GREAT TO GET THE AIR BUBBLES OUT


And then it was the waiting game. We let the countertops dry for a little over a week before we took it out of the mold.


curing DIY concrete countertops


To remove the mold unscrew the edge melamine boards and carefully separate from the top.


removing DIY concrete countertops from the mold


We let the concrete again sit out of the mold for a few days, to ensure no shifting or cracking and that they were 100% solid and dry.


drying out DIY concrete countertops before sealing


For our top we wanted the aggregate in the concrete to show, therefore we left a lot of the pebbles on the top to show. To get this look we used a 4? angle grinder with a diamond wheel to grind off the top layer of cement once dry. For this step make sure to do it outside and wear a mask because it's very dusty. Once it was at the point we wanted it, we picked up some sealer from our local hardware store.


how to make your own solid concrete DIY countertops with forms and tinted concrete (9)


Concrete is very porous so it need some kind of sealer on it to keep it clean. We used a bar top sealer. It's most commonly used on wood but we thought we would give it a try on concrete. And it worked great! For the best finish wait 30 days for the countertop to fully cure. This will ensure no moisture is left in the top which can cause the sealer to fail.


master bathroom renovation with DIY concrete countertops Construction2Style on @Remodelaholic (11)


We were both so happy on how it turned out! It was even better than we had thought it was going to be! haha!! And have since been hired to make a handful for our clients from bar tops, to bathrooms for vanities. I think for our next house, we are ready to conquer a bigger concrete project!


In the end we decided on a simple, clean and modern bathroom design. Using a neutral color scheme, asymmetrical balance, and clean lined design.


master bathroom renovation with DIY concrete countertops Construction2Style on @Remodelaholic (7)


And here it is in our finished remodeled bathroom including details of where we bought our finishing selections.


master bathroom renovation with DIY concrete countertops Construction2Style on @Remodelaholic (4)


Custom Vanity Built by construction2style

Vessel Sinks | Build

Faucets | Build

Mirrors | Walmart (spray painted silver)

Frames | Home Goods

I Love Us Signage | Paper Source

Towels | Pottery Barn

Herringbone Wood-Looking Tile Flooring | Home Depot

Shower Tile | The Tile Shop


master bathroom renovation with DIY concrete countertops Construction2Style on @Remodelaholic (14) master bathroom renovation with DIY concrete countertops Construction2Style on @Remodelaholic (9) master bathroom renovation with DIY concrete countertops Construction2Style on @Remodelaholic (10)master bathroom renovation with DIY concrete countertops Construction2Style on @Remodelaholic (23) master bathroom renovation with DIY concrete countertops Construction2Style on @Remodelaholic (24)


tutorial to make your own DIY concrete countertops Construction2Style on @Remodelaholic (20) tutorial to make your own DIY concrete countertops Construction2Style on @Remodelaholic (35)


---------------------------------------


Jamie and Morgan, thank you SO much for visiting again and sharing with us!


Remodelaholics, be sure to go visit Morgan and Jamie at Construction2Style to see more, like the details of that gorgeous herringbone wood tile floor and this lovely marble fireplace update.


carerra marble fireplace Construction2Style


The post DIY Concrete Countertops in a Beautiful Master Bathroom Renovation appeared first on Remodelaholic.