“Many of our decisions to add things we think we need in our home or will enjoy in life are the cause of additional clutter and stress. It's become almost second nature in our culture to think we are going to enhance our life with something new when inadvertently we have made it more complicated.” […]
Hello Remodelaholic readers! Colleen here from Lemon Thistle, home to DIY, home decor, printables, and parties. I'm thrilled to be back with you today sharing my DIY Stone Fireplace Update! When we moved into our home almost two years ago, our living room had damaged hardwood floors with carpet overtop, dated wood panelling, and a tan stone fireplace. Not my cup of tea. We refinished the floors and painted in a hurry, then made do with the fireplace. It bugged us… all the time, but we weren't about to rip it out to reface it. We decided that since we hated it so much, there was nothing to lose if we 'wrecked' it experimenting. So we decided to paint it and update the mantle. Yep! We decided to paint the stone. Call us crazy, but we are 1000x glad we did. We are totally in love with our new fireplace and how well it compliments the rest of the updates we have made in our house.
How to Update a Stone Fireplace and Add a Live Edge Wood Mantel
There were three parts to this fireplace refresh: the painted stone, the mantle, and the painted brick. Each comes with it's own challenges (but once you have it figured, you're golden!). If you have the right products, it will be easy to give your fire place a fresh look with a bit of elbow grease (believe me, painting stone is an elbow grease kind of job). For this refresh, here's the supplies we used:
TSP and rag for cleaning the stone
Pry bar and hammer to remove old mantle
Indoor/Outdoor stone friendly primer and stiff, affordable paintbrush (get two- one for primer, one for paint and toss them in the trash after you're done)
Black heat resistant paint for the brick and paint brush you can toss in the trash when you're done
White interior latex paint (I used trim paint)
Live edge wood for mantle (call around, we got ours from a rural builder that had piles of the stuff laying around)
Sandpaper (I used 100 grit and 120 grit)
Varathane crystal clear water based polyurethane (I used a satin finish) with quality paint brush (I love the Purdy ones for poly)
Caulking gun and PL (construction adhesive)
The first thing we did is clean up the fireplace. As you can see from the photo- this thing hadn't been used as a fireplace in a long time. Stone is difficult to clean- you could also use a wire brush, but I just took my time with a rag (several rags, actually) and a TSP formula.
When you're sure it's nice and clean (so paint can stick to it), you can get to painting. A stone friendly primer will stick to this stuff great. BUT it's a pain to get even coverage. Using a stiff brush (and don't expect to use it again) with a dabbing motion will help you get into all the nooks and crannies. I found I would load up my brush and paint it on before going back over, pressing the paint into the crevices.
For the grout, I would angle my brush down to get the top of the bottom stone and then go back over angling it up to get the bottom of the top stone. You need to move around a lot because the stone tricks you! It looks great from where you're painting… then you move and you see all the spots you've missed. It also pools if you put it on too thick and I really wanted the texture of the stone to stay true, not glossy pools of paint, so I kept going back over to dab it in. I'm not going to lie… this takes fooooorever. Especially if you need to take breaks to nurse a baby.
I also primed the base of the fireplace and the slate grout lines to brighten it up (the white it was painted was faded and dirty looking).
Let your primer dry before moving to your paint. I chose to paint mine white like our trim. This coat goes quite a bit quicker since you don't need to be quite so picky with all the little nooks and crannies as they should already be white. The interior of the fireplace should go much quicker. Make sure that you choose a heat resistant paint in case anyone decides to try using the fireplace again (we don't plan on it, but better safe than sorry!). I'm amazed how much this helped freshen the look- a little bit of black paint. This stuff is quite smelly, so make sure you open up all your windows/ turn on fans/ wear a mask/ keep kids away… you know the drill.
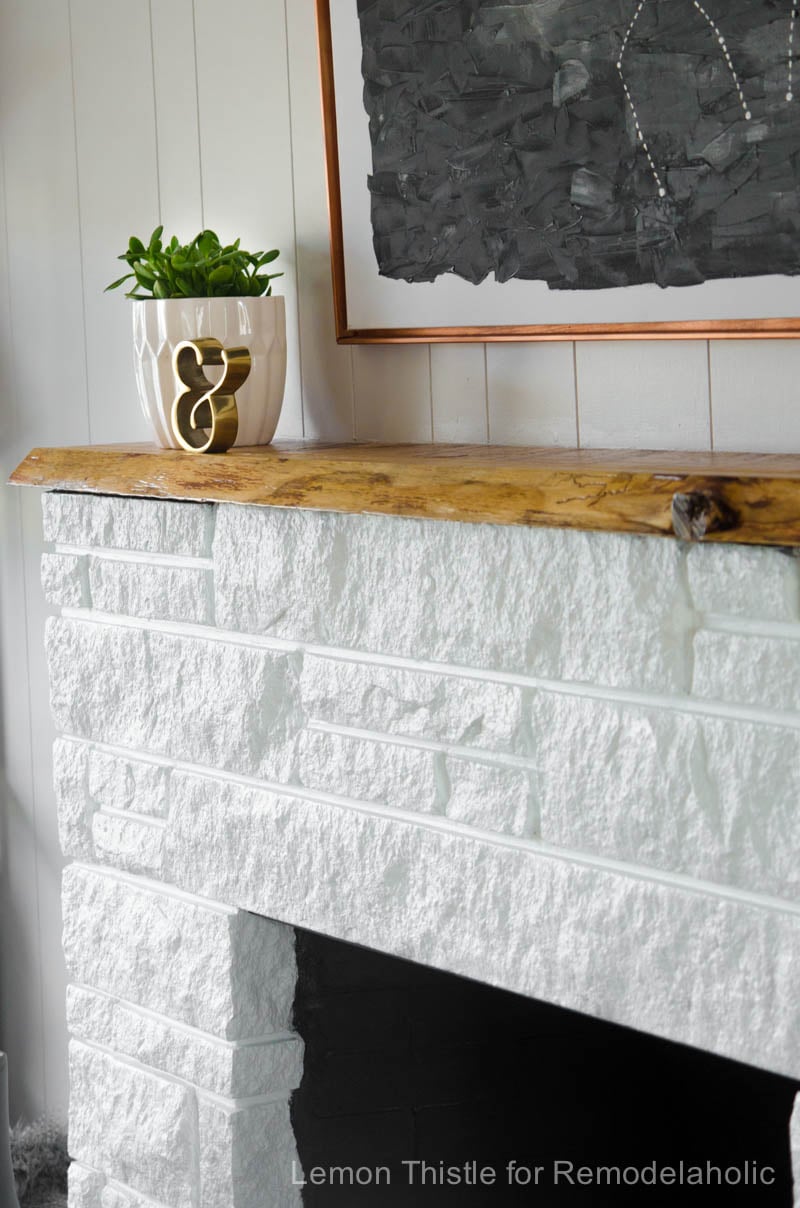
Now your fireplace is ready for a new mantle (the best part!). We removed our old one with a prybar and hammer- it came off easy. We spotted some piles of live edge planks out by a campsite we used a couple years back and managed to snag this piece for under $50. We love the knots in it and the radial saw marks. We wanted to preserve all that character so only used a 100 grit sandpaper followed by a 120 grit sandpaper to smooth down jagged edges and clean the dirt out. When it's sanded to your preference, time to protect it.
I've used the Varathane crystal clear water based poly before (I love the satin finish) and am happy with how it brings out the natural colour in the wood without yellowing. I applied 6 generous coats of this, allowing it to dry fully in between each. I really wanted the mantle to look finished- not rough and the poly did the trick. The satin finish is also great because it gives the sheen without the high gloss that picks up fingerprints. You'll see that it goes on a milky colour, but don't worry- it dries clear. It's important to use a quality paint brush (I used Purdy) so you don't end up with shed brush hairs in your finished clear coat.
To attach the mantle, we used PL- our go-to construction adhesive. It's like a super glue that's meant for big jobs. It's ugly, so make sure you don't apply it too close to the edges, but it won't go anywhere. This is the most satisfying part- because you can immediately start decorating it!
I know painted stone isn't for everyone, but we're head over heels for it. And the mantle? Sigh* it makes me all sorts of happy. The best part is that since we had most of the supplies on hand (we only had to buy the wood, masonry primer, and heat resistant paint), this project rang in under $100 for us. And since I love the mantle now, I'm not temped to crowd it with too much decoration to hide the awful panelling that is pretending to be wood! My whole living area benefits from this change! Tell me… would you ever paint stone?
I might have just gotten the award for #bestsisterever… it is true!
I just gave my brother a 55″ curved screen TV.
#ohyeah!
EEK! It is so fun to be the prize patrol!
To make sure that the AMAZING TV looked its best and works its best, we mounted it on the wall (which will help keep little fingers from smudging the screen since it is a little harder to reach!) Also, while curved screens are amazing you can't attach them to the wall with just any TV mount. That is where the brand new SANUS Swivel Mount for Curved TVs (VLC1 – sold exclusively on Amazon.com, right now) was designed specifically for use with curved TVs.
As you can see in the video below, the best feature about this mount is that it allows you to swivel your curved TV up to 10 degrees left and right for the best of immersive viewing experience in any seat since, with Curved TVs the best spot for viewing is right in the center of the screen, so the ability to swivel your TV is an important feature. Why buy an amazing TV like this if you can't see it at its best!!
So here is how it all went down.
So we stopped by my brother's house, knocked on the door and delivered a TV and the mount. Here is the space before. Their TV was a fine TV, but the sound didn't work, and it was scratched up from the local wildlife children.
My brother and my handy hubby got right in there and installed the mount and hung the TV so quickly! All in all, about 30 minutes (and that included recording a tutorial which makes everything take longer!! Imagine the constant question “Did you get a picture of that?”… not as glamorous as you might think! )
Check out the video below of how to install it, to see, just how easy it is to hang the curved TV.
P.S. If you are checking this out so that you too can mount a curved TV to the wall, be sure to read the instructions, for safety and well as ease of installation.
Seriously the whole space looks more exciting and the TV was a hit, my cute niece Gabby came right up to watch her Japanese anime show within about 2 minutes of hanging it! And so now I am ALSO the self proclaimed #favoriteaunt!
This is a sponsored conversation written by me on behalf of SANUS. The opinions and text are all mine.
BHG I've been in an outdoor daybed sort of mood lately. Not sure what that means, exactly, but I guess it at least means I must be in the mood to get comfy and take a nap outside? Actually, that really sounds good to me. Today I am sharing just a few images of outdoor daybeds, two hanging and one not, that have […]
Time to glam up your tub! When you choose a bathtub, you agonize over the shape, the size, the material, the type – freestanding, undermount, drop-in? Whirlpool, air tub, or soaker? Slipper? Clawfoot? Acrylic, copper, stone? The choices are endless. … Continued
Hello Remodelaholic readers! Madeline here from The Life We Dream! The last time I was here I shared how I organized my closet after moving in with my parents. Today I am going to share my “makeover” of my bathroom vanity!
When I moved, I basically threw everything from my old (& very large) master bedroom (you can see it here in our home tour!) into bins & reusable grocery bags. I hauled them across town, threw them under the sink… and that was it.
Fast forward 5 months and I could not find anything I was looking for and I routinely just tossed things in & closed the door as quickly as possible. Whoops! I knew I needed a better solution, so I started by cleaning everything out. I ended up throwing away a bunch of stuff (this is why you should always purge before you pack!) & keeping only the essentials.
*This post contains affiliate links. See our full policy and details here.
First, I knew that I needed some storage for “extras”- extra toothpaste, dry shampoo, lotion, etc. The things that I would need on a daily basis, but want to keep handy. I put all of my extras into one of these bins (you get 6 for $25 or less!) & then put items I use more regularly into another one. I then stacked them on top of each other to use some vertical space. (You could also use these similarly priced bins that are made for stacking, instead of just turning one basket the other way to stack.)
After that space was looking better, it was time to work on the drawers. My favorite way to organized make up is in an inexpensive desk organizer– lots of cubbies in all different sizes! Mine were currently overflowing and just not working. I threw away any expired make up or anything I never used & relegated all of the extras to my extra bin. This freed up enough space to make everything functional again. If you're interested here is my make up routine!
I did the same thing to the second drawer and moved onto the vanity top.
I love trays. Like love them- they corral things and make them look nice and they just make me happy. However, I had basically just thrown a ton of things into my little tray and called it a day. This vanity top is almost too small for a tray, but that wasn't going to stop me.
I put the ugly every day essentials (aka tooth paste & deodorant) into the medicine cabinet for quick use and let the cuter every day essentials hang out (perfume & lipstick for the win). The other side of the vanity holds my electric toothbrush and q-tips- not the most glamorous, but a girl has to brush her teeth!
If you're cramped for bathroom counter space, you could also use a chic acrylic makeup organizer, which can hold more than just makeup!
All in all this organization project took a few hours and a few bins. I don't cringe anymore when I open the cabinets and my morning goes much smoother! It's the little things in life : )
Thanks for letting me share- I am so excited to be here! Feel free to stop by my corner of the internet- The Life We Dream– or check us out on our favorite social media site- Instagram & Facebook!
You all know I love a “better than it was” project! As you also know, I've been staring at my fireplace for eight months, wondering how to fix it. The mauve grout, the dated color. The off-centeredness. We could rip it all out, but that comes at a cost of time, money and mess. When […]
The fireplace gets a lot of attention in the home. What material? What shape? What size? Gas or electric? Mantle or no mantle? In all the decision-making, the chimney is often left out, which is unfortunate; the right chimney can truly … Continued
Let me introduce you to my kitchen. Which became an extension of my dining room after I removed the wall in between the two. My first floor pretty much became one big room and I really wouldn't have it any other way. My house isn't big. 1480 square feet to be exact. But it's open. I can watch tv while I'm doing the dishes and that's really what it's all about. My kitchen was very much a DIY remodel. So let me give you the deets on what I tackled myself and what I left to the professionals.
(It's a little hard to tell, but the next photo is from just about the same vantage point as this one. Where there once was a window, there is now a range hood.)
The cabinets
I weighed lots of options when it came to kitchen cabinets and decided on IKEA. Yes we would have to assemble them ourselves but the quality and price was right. I decided to go with the style that closest resembled “shaker style.” This style is classic but can also look modern depending on the finishes its paired with. I desperately wanted grey cabinets but at the time IKEA didn't offer them. I took all the drawer and door fronts to a local furniture company to be professionally painted. Well worth the money. IKEA has a very easy and user friendly way to install cabinets. My sister and I installed them ourselves in a weekend.
Kitchen hardware
My dad and I installed the hardware ourselves. An easy job that really anyone can do. I chose 3 different types of black hardware to make my kitchen look more custom.
Backsplash
Subway tile. Subway tile. Subway tile. I'm in love with subway tile! It's such a timeless and classic choice. Not to mention inexpensive. Switching up the backsplash would not be an easy task so I went with “classic” over “trendy.” I will never not love subway tile. Period. My sister and I borrowed a wet saw and tiled it ourselves. I was super intimidated but my sister had the gusto to try it and once we got going it was like riding a bike.
Countertops
Against every practical person's advice, I went with white marble. Yeah yeah yeah I heard all the warnings. It scratches, it etches, it stains. But in the end I decided to throw caution to the wind. Even with the threat of all those imperfections they would still be more beautiful than any man-made material. And three years later I don't regret my decision one bit. I had the marble people fabricate and install them because I wouldn't even know where to begin to do it myself.
Favorite Features
The brick. My absolute favorite feature of this kitchen was something I originally was so annoyed about. See that beautiful brick in the corner? Before it was brick, it was just a large mass of space I had to design the cabinets around. But after working hard to expose it, it has become my favorite part of this kitchen. It brings a warmth, age and an architectural detail that you cannot find in newer homes.
My sink!: I love our 36 inch farmhouse sink. It's huge and I hope to someday bathe several future babies in it.
Open shelving: Its not for everyone but I love it. So French.
This house remodel has been a labor of love. And this kitchen is very much the heart of our home.
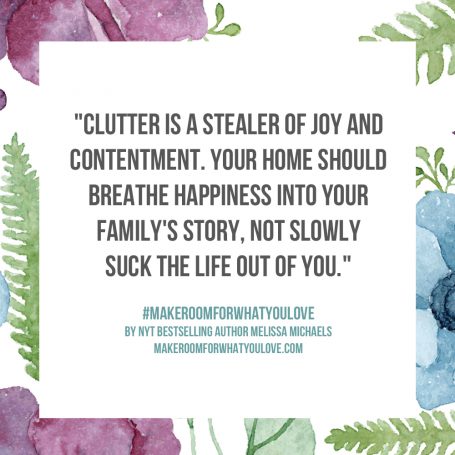 “Many of our decisions to add things we think we need in our home or will enjoy in life are the cause of additional clutter and stress. It's become almost second nature in our culture to think we are going to enhance our life with something new when inadvertently we have made it more complicated.” […]


 BHG I've been in an outdoor daybed sort of mood lately. Not sure what that means, exactly, but I guess it at least means I must be in the mood to get comfy and take a nap outside? Actually, that really sounds good to me. Today I am sharing just a few images of outdoor daybeds, two hanging and one not, that have […]


 I love trays. Like love them- they corral things and make them look nice and they just make me happy. However, I had basically just thrown a ton of things into my little tray and called it a day. This vanity top is almost too small for a tray, but that wasn't going to stop me.
 I put the ugly every day essentials (aka tooth paste & deodorant) into the medicine cabinet for quick use and let the cuter every day essentials hang out (perfume & lipstick for the win). The other side of the vanity holds my electric toothbrush and q-tips- not the most glamorous, but a girl has to brush her teeth!
 All in all this organization project took a few hours and a few bins. I don't cringe anymore when I open the cabinets and my morning goes much smoother! It's the little things in life : )


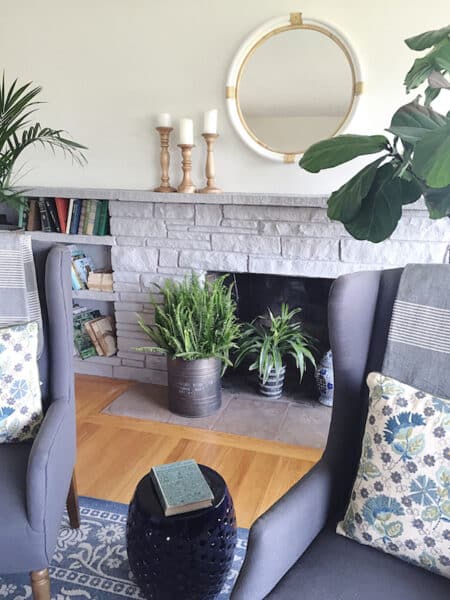 You all know I love a “better than it was” project! As you also know, I've been staring at my fireplace for eight months, wondering how to fix it. The mauve grout, the dated color. The off-centeredness. We could rip it all out, but that comes at a cost of time, money and mess. When […]
 (It's a little hard to tell, but the next photo is from just about the same vantage point as this one. Where there once was a window, there is now a range hood.)


